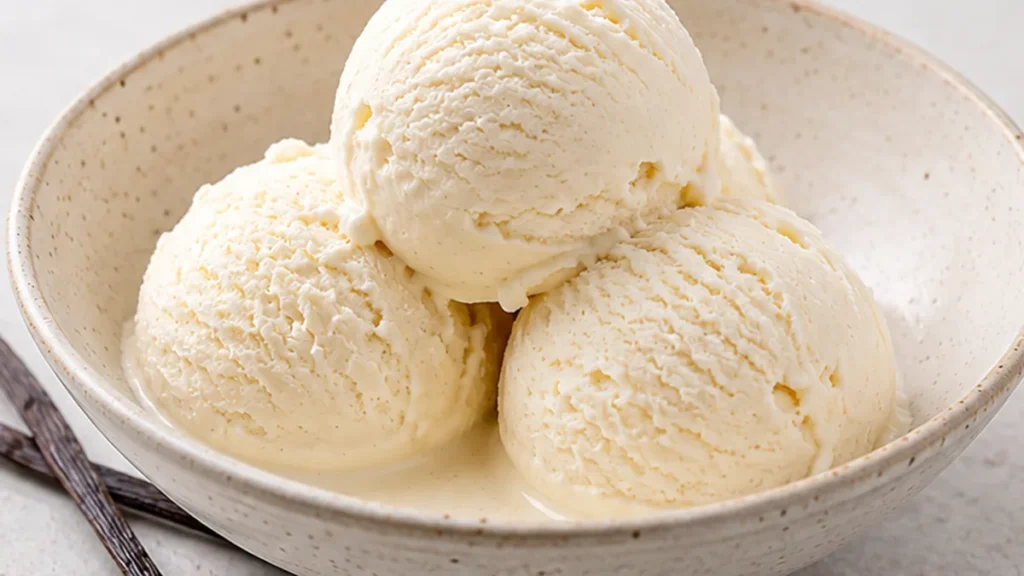
Dairy free ice cream : Craving a creamy, delicious ice cream without the dairy? This dairy-free ice cream recipe is your answer! Made with simple ingredients like eggs, allulose, vanilla extract, and gelatin, it delivers a rich, smooth texture that rivals traditional ice cream. Perfect for those with lactose intolerance or following a dairy-free lifestyle, this recipe proves that you don’t need dairy to enjoy a fantastic frozen dessert. It’s surprisingly easy to make and incredibly satisfying.
Key takeaways
- The richness and smooth texture of this dairy-free ice cream come from gently cooked egg yolks and dissolved gelatin.
- Properly chilling the base before freezing is crucial to prevent large ice crystals and achieve a scoopable consistency.
- Adjust sweetness before freezing, as cold temperatures can mute flavors.
- Troubleshooting common issues like iciness or hardness involves controlling freezing speed and ensuring ingredients are properly incorporated.
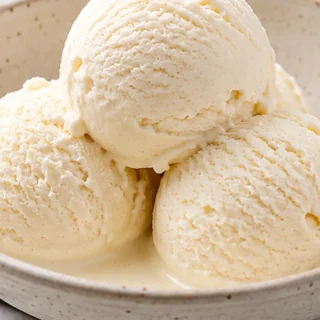
Dreamy Dairy-Free Vanilla Ice Cream!
Ingredients
- 2 large eggs
- 1 1/2 tablespoon allulose
- 2 teaspoon vanilla extract
- 1/2 teaspoon unflavored gelatin
- A freezer-safe container (for freezing)
Instructions
- Gather and prep all of your ingredients.
- Separate the egg yolks from the egg whites, placing into two separate bowls large enough to use a mixer in.
- Add the allulose, vanilla extract, and gelatin to the egg yolks and whisk together using a hand-held mixer until pale and fluffy.
- Whisk the egg whites until medium peaks form. Pour in the egg yolk mixture and gently fold to incorporate.
- Pour the mixture into your freezer-safe container and freeze for 4-6 hours until the desired consistency is reached. Alternatively, churn in an ice cream maker.
- Once ready to eat, scoop and serve immediately. This dairy-free ice cream melts relatively quickly, so enjoy its creamy texture right away!
Notes
The technique that makes it
Creating a creamy, dreamy dairy-free ice cream without traditional dairy relies on a few key principles. For this specific recipe, the magic lies in the combination of egg yolks and a touch of gelatin. The egg yolks provide richness and a smooth mouthfeel due to their fat content and emulsifying properties. When gently heated, they thicken the base, contributing to a custard-like texture that prevents large ice crystals from forming. The allulose acts as a sugar substitute, providing sweetness without the same freezing point depression as regular sugar, which can lead to a harder ice cream. Vanilla extract, of course, is crucial for flavor. The unflavored gelatin is the unsung hero here. When bloomed and dissolved into the warm base, it helps to bind water molecules, further inhibiting the formation of large, crunchy ice crystals. This results in a smoother, more scoopable texture, even without the fat and stabilizers typically found in dairy ice cream. The key is to gently temper the eggs to avoid scrambling, then chill the base thoroughly before churning or freezing to ensure the best possible texture. Proper chilling before the freezing stage is paramount for achieving that ideal ice cream consistency.
Troubleshooting
- Icey Texture: This often occurs if the base wasn’t chilled sufficiently before freezing, or if the freezing process was too slow. Ensure the base is thoroughly cold (refrigerated for at least 4 hours, preferably overnight) before transferring it to the freezer. If using an ice cream maker, ensure it’s properly pre-frozen. If freezing without a maker, stir vigorously every 30-60 minutes during the initial freezing hours.
- Not Sweet Enough: Allulose has a sweetness profile that can be perceived differently by individuals. Taste the base *before* freezing and adjust the allulose slightly if needed. Remember that sweetness is often perceived less intensely when the mixture is very cold.
- Eggy Flavor: This can happen if the eggs were cooked too aggressively during tempering, or if the vanilla extract is not potent enough. Temper the eggs very gently over low heat, and ensure you are using a good quality, pure vanilla extract. Adding a tiny pinch of salt can also help balance flavors and reduce any perceived eggy notes.
- Too Hard/Not Scoopable: This is often due to insufficient fat or the formation of large ice crystals. While this recipe is intentionally lower in fat, ensuring the gelatin is fully dissolved and the base is well-chilled are the best defenses. A slightly longer freezing time or a brief period at room temperature before scooping can also help.
Substitutions
- Allulose: You can substitute with erythritol or a blend of erythritol and monk fruit sweetener. The sweetness level might vary, so taste and adjust. The final texture might be slightly different, potentially a bit harder, as different sugar alcohols have varying effects on freezing points.
- Eggs: For an egg-free version, you would need a different base entirely, likely relying on full-fat coconut milk or cashew cream for richness and body, along with a different stabilizer like xanthan gum or guar gum. This recipe is specifically designed around the eggs.
- Vanilla Extract: High-quality almond extract or a blend of vanilla bean paste and extract can be used for a different flavor profile. Ensure the extract is pure for the best taste.
- Unflavored Gelatin: Agar-agar powder can be used as a vegan alternative. You would typically use about 1 teaspoon of agar-agar powder bloomed in a small amount of liquid before adding to the warm base, and it requires boiling briefly to activate. The texture might be slightly firmer.
Pro tips
- Use a good quality vanilla extract for the best flavor.
- Ensure your egg whites reach medium peaks for the best airy texture.
- If using an ice cream maker, follow the manufacturer’s instructions.
- This ice cream is best enjoyed fresh as it can become quite hard if frozen for too long.
Enjoy this delightful dairy-free vanilla ice cream guilt-free! It’s a simple yet satisfying treat for any occasion.
More from Keto Desserts & Sweets →
Frequently asked questions
Can I make this dairy-free vanilla ice cream without an ice cream maker?
Yes, you can! Freeze the mixture in a shallow pan, stirring vigorously every 30 minutes for the first 2-3 hours to break up ice crystals. It won’t be as smooth as machine-churned, but it will still be delicious. Ensure the pan is freezer-safe and cover it tightly.
What are good substitutes for full-fat coconut milk in keto ice cream?
For a similar richness, try full-fat canned cashew cream or a blend of unsweetened almond milk with a tablespoon of avocado oil or MCT oil per cup. Heavy cream alternatives like unsweetened soy or oat milk can work but may alter texture and flavor slightly. Ensure they are unsweetened.
How long does homemade dairy-free keto ice cream last in the freezer?
Properly stored, this ice cream should last for about 1-2 weeks in the freezer. Keep it in an airtight container, pressing plastic wrap directly onto the surface to prevent ice crystals from forming. Over time, the texture may become harder, so let it soften slightly before serving.
Can I add other flavors to this dairy-free vanilla ice cream recipe?
Absolutely! This recipe is a fantastic base. Try adding sugar-free chocolate chips, a swirl of sugar-free caramel sauce, or some fresh berries after churning. A touch of almond extract or espresso powder can also create delicious variations. Adjust sweeteners as needed for new ingredients.