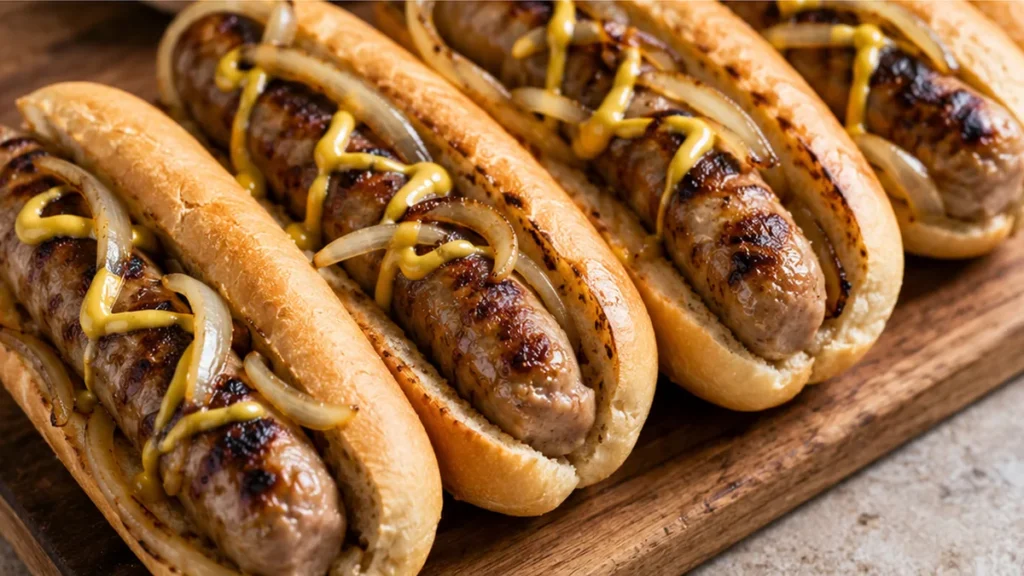
Beer brats achieve their best flavor through a two-stage cooking process: simmering in a savory liquid before grilling. This method ensures they are cooked through, tender, and infused with aromatics before reaching that perfect charred exterior. This beer brats recipe takes a classic approach, combining the richness of lager with the sweetness of onions and a blend of spices.
Key takeaways
- Choose a light lager for optimal flavor and tenderness.
- Sear brats at 400°F for a perfect Maillard reaction.
- Caramelize onions to enhance sweetness and depth.
- Allow brats to rest post-grilling for juiciness.
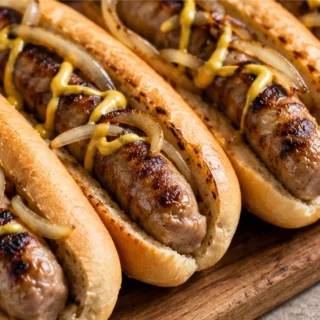
Sizzling Beer Brats: Your Grill’s New Best Friend!
Ingredients
- 3 (12-ounce) cans beer, preferably lager
- 1 large yellow onion, thinly sliced
- 2 tablespoons onion powder
- 2 teaspoons garlic powder
- 2 teaspoons freshly cracked black pepper
- 1 teaspoon kosher salt
- 6 bratwurst sausages (about 1¼ pounds)
- 1 tablespoon extra-virgin olive oil
- 6 hoagie rolls, toasted
- Mustard, for serving
Instructions
- Preheat the grill on medium.
- To a large pot, add the beer, onion, onion powder, garlic powder, pepper, and salt. Bring to a boil over high heat, then add in the bratwurst. Reduce the heat to low and simmer for 10 minutes, or until onions are soft. Transfer bratwurst to a plate and continue cooking onions until the sausages are off the grill, about 10 more minutes.
- Brush the grill with olive oil. Add the bratwurst and cook, undisturbed, for 3 minutes. Rotate and continue cooking until browned and the internal temperature reaches 160°F on an instant-read thermometer, 5-8 more minutes.
- Transfer bratwurst to a platter and serve family style with onions, buns, mustard, mayonnaise, and sauerkraut on the side.
Video
Notes
Understanding the Role of Beer in Beer Brats
The key to perfect beer brats lies in the choice of beer, which not only adds flavor but also helps in the cooking process. Lagers are preferred for their smooth and crisp profile, which complements the savory taste of bratwurst. The alcohol content in beer helps to tenderize the meat, breaking down proteins and enhancing juiciness. Aim for a beer with an alcohol by volume (ABV) of around 4-6% for optimal results.
Achieving the Perfect Sizzle on the Grill
The Maillard reaction is crucial for developing that coveted caramelized exterior on your brats. This reaction occurs at temperatures above 300°F (150°C). Preheat your grill to medium-high heat, around 400°F (200°C), to ensure a good sear. Place the brats on the grill and cook for about 6-8 minutes per side, turning them occasionally to prevent burning and ensure even cooking.
Why Onion Matters in Your Beer Brats
Onions play a pivotal role in enhancing the flavor profile of beer brats. Thinly sliced onions caramelize beautifully when cooked, adding sweetness and depth. Cook them in a bit of olive oil until they turn golden brown, which usually takes about 10-15 minutes over medium heat. This process not only softens the onions but also releases their natural sugars, which contributes to the overall flavor of the dish.
Common Mistakes and How to Avoid Them
- Overcooking the Brats: If brats are cooked too long, they can dry out. Aim for an internal temperature of 160°F (70°C) for optimal juiciness.
- Using the Wrong Beer: Avoid using overly bitter or dark beers, as they can overpower the dish. Stick with a light lager for a balanced flavor.
- Skipping the Resting Period: Letting the brats rest for 5 minutes after grilling allows the juices to redistribute, ensuring they remain moist when served.
Enhancing Flavor with Simple Swaps
- Swap Lager for Wheat Beer: This will add a slightly fruity flavor, but may also make the dish a bit sweeter.
- Use Yellow Mustard Instead of Spicy: This will provide a milder taste, appealing to a broader audience, especially kids.
- Replace Olive Oil with Butter: This will create a richer flavor, but also increase the calorie content.
How to Prepare Beer Brats in Advance for a Stress-Free Meal
Making beer brats ahead of time can save you valuable minutes on a busy day. Start by cooking the bratwurst in the beer mixture as directed. Once cooked, let them cool to room temperature, then store them in an airtight container in the refrigerator for up to three days. When ready to serve, simply reheat them on the grill for about 5-10 minutes, allowing them to warm through and regain their sizzle. This method ensures that you can enjoy the rich flavors without the last-minute rush.
Scaling Up Your Beer Brats for a Crowd
When hosting a gathering, you may want to scale your beer brats recipe. For every additional batch, maintain the same ratio of beer to bratwurst, using three cans of beer for every six bratwurst sausages. Ensure your grill has enough space to accommodate the extra sausages without overcrowding, which can lead to uneven cooking. Adjust cooking time slightly, as more sausages may require an additional 5-10 minutes on the grill to achieve that perfect internal temperature of 160°F (71°C).
Choosing the Right Equipment for Perfectly Grilled Beer Brats
Grilling beer brats requires specific equipment to achieve optimal results. A gas grill provides consistent heat, while a charcoal grill adds a smoky flavor that can enhance the dish. If using a grill pan, ensure it is well-oiled to prevent sticking. A meat thermometer is essential for checking the internal temperature of the bratwurst, ensuring they are thoroughly cooked. Additionally, having a large pot for simmering the beer and bratwurst can help infuse the flavors effectively before grilling.
Seasonal Considerations for Beer Brats
Seasonality can significantly affect the flavor and quality of your beer brats. In summer, fresh local bratwurst can be found, which tends to be juicier and more flavorful. During colder months, opt for higher-quality frozen bratwurst to maintain texture and taste. Additionally, pairing with seasonal toppings, such as grilled peppers in summer or sautéed mushrooms in fall, can elevate the dish. Adjust the beer choice based on seasonal brews available, as craft breweries often release seasonal lagers that can enhance the flavor profile of your beer brats.
How to Store Leftover Beer Brats for Maximum Freshness
Proper storage of leftover beer brats is essential to maintain their flavor and texture. Once cooked, allow the brats to cool to room temperature before storing. Place them in an airtight container and refrigerate for up to 3 days. For longer storage, consider freezing them. Wrap each brat tightly in plastic wrap and then place them in a freezer-safe bag. They can be frozen for up to 3 months. When ready to eat, thaw in the refrigerator overnight and reheat on the grill or stovetop to restore their sizzle.
Scaling Up Beer Brats for Larger Gatherings
When preparing beer brats for a crowd, scaling the recipe is straightforward but requires attention to cooking times and equipment. For every additional 6 bratwursts, add another can of beer and increase the onion proportionally. Ensure your grill can accommodate the extra brats without overcrowding, which can lead to uneven cooking. Monitor the internal temperature, aiming for 160°F (71°C). Consider using a larger pot for simmering the brats in beer before grilling, ensuring that they are evenly heated.
Choosing the Right Beer for Seasonal Flavors
The choice of beer can significantly influence the flavor profile of your beer brats. In summer, light lagers or wheat beers can add a refreshing taste, while in winter, darker beers like stouts or porters contribute rich, deep flavors. Seasonal ingredients like fresh herbs or spices can also enhance the brats. For example, adding rosemary or thyme in the summer can provide a bright, aromatic quality, while winter might call for a dash of smoked paprika for warmth.
How to Make Beer Brats Ahead of Time for a Stress-Free Meal
Preparing beer brats in advance can significantly reduce stress on the day of your gathering. Start by cooking the bratwurst in the beer and onion mixture as directed. Once cooked, allow them to cool to room temperature. Transfer the brats and the cooking liquid into an airtight container and refrigerate for up to 3 days. When ready to serve, simply reheat the brats on the grill or stovetop, ensuring they reach an internal temperature of 165°F (74°C). This method not only saves time but also allows the flavors to meld further, enhancing the overall taste.
Understanding the Impact of Ingredient Quality on Beer Brats
The quality of your ingredients plays a crucial role in the final flavor of your beer brats. Opt for high-quality bratwurst made from fresh meat and spices, as they will provide a more robust flavor. Additionally, the beer you choose can also affect the taste profile; craft lagers or local brews often have unique notes that can elevate the dish. Fresh onions are essential as well; they should be firm and free from blemishes for the best sweetness when caramelized. Seasonal variations in these ingredients can also alter the dish’s flavor, making it essential to choose wisely based on availability.
Why Properly Storing Leftover Beer Brats Matters
Storing leftover beer brats correctly is crucial to maintain their flavor and texture. After cooking, allow the brats to cool to room temperature before refrigerating. Place them in an airtight container to prevent moisture loss, which can lead to a dry texture. Ideally, consume leftover brats within 3-4 days. For longer storage, consider freezing them. Wrap each brat tightly in plastic wrap and then place them in a freezer-safe bag. Frozen beer brats can last up to 3 months. When reheating, thaw them overnight in the refrigerator and reheat gently on the grill or in a skillet over medium heat to preserve their juicy texture.
How to Scale Beer Brats for Larger Gatherings
Scaling up your beer brats for larger gatherings requires careful consideration of both ingredients and cooking methods. For every additional pound of bratwurst, increase the amount of beer by approximately 1 can (12 ounces) to ensure proper flavor infusion. The same ratio applies to the other seasonings; for example, increase onion powder and garlic powder proportionally. When cooking in larger batches, use a grill with ample space and avoid overcrowding, which can lead to uneven cooking. Monitor the internal temperature of the brats, ensuring they reach at least 160°F (71°C) for safety. Additionally, consider using a beer-infused marinade for the brats before grilling to enhance flavor.
Pro tips
- Food Safety First: Always cook bratwurst to an internal temperature of 160°F (71°C) for safe consumption.
- Caramelize Onions: Continue cooking the simmered onions longer after removing the brats for extra sweetness and depth.
- Toast Your Buns: A lightly toasted hoagie roll holds up better to the juicy brats and toppings. Don’t skip this step!
This Beer Brats recipe is a tried-and-true favorite that brings joy to any gathering. Experiment with different beers for simmering or your favorite toppings to customize your perfect brat. Enjoy!
Frequently asked questions
Can I use other types of sausages instead of bratwurst?
Yes, you can substitute bratwurst with other sausages like Italian or kielbasa. However, the flavor profile will change, and cooking times may vary based on the sausage type.
How long should I cook the brats on the grill?
Grill the brats for about 6-8 minutes on each side over medium-high heat, ensuring they reach an internal temperature of 160°F (70°C) for safe consumption.
What if I don’t have a grill?
You can cook beer brats on a stovetop in a skillet or in the oven. For stovetop cooking, use a cast-iron skillet and follow the same cooking times, adding a little beer to the pan for flavor.
Can I prepare beer brats in advance?
Yes, you can pre-cook the brats and store them in the refrigerator. When ready to serve, simply reheat them on the grill or in a skillet for a few minutes until warmed through.
More from Keto Dinners & Mains →